Beekeeping is one of those hobbies that not only connects you with nature but also provides numerous benefits, both personal and environmental. As a beekeeper, you’ll experience the joy of harvesting your own honey, contribute to supporting local ecosystems, and help combat the decline of bee populations. If you’ve been wondering how to start your own beehive in your backyard, you’re in the right place. I’ve put together a comprehensive guide that covers everything you need to know to get started as a beginner beekeeper. Let’s get started!
1. Why Start a Beehive?
The Importance of Bees
Bees are vital for pollination, which is responsible for approximately one-third of the food we consume. Without bees, we would face a dramatic decline in the production of fruits, vegetables, and nuts. By starting a beehive, you’re contributing directly to the survival of these essential pollinators. And let’s not forget that bees are fascinating creatures to observe!
Personal Benefits
Beekeeping is not only beneficial to the environment but also rewarding on a personal level. There’s something incredibly satisfying about producing your own honey, which you can share with family and friends or use in your cooking. And as a bonus, beeswax can be used for a variety of purposes, including making candles, lotions, and even lip balms.
Environmental Impact
As bee populations decline worldwide due to factors like habitat loss, pesticides, and disease, beekeepers play a crucial role in supporting healthy bee colonies. Having a hive in your backyard can contribute positively to local ecosystems by providing bees with a place to thrive and pollinate.
2. Essential Beekeeping Equipment
Bee Hive
First and foremost, you’ll need a beehive. There are different types of hives to choose from, with the Langstroth hive being the most common. It consists of stacked boxes with frames for the bees to build their honeycomb. Langstroth hives are popular because they’re easy to manage, and you can add or remove boxes as your bee colony grows.
Other types of hives include Top Bar and Warre hives, but for beginners, I recommend starting with a Langstroth hive due to its simplicity and the wealth of information available for managing this style of hive.
Bees
Once you’ve chosen your hive, the next step is to acquire bees. You can purchase bees from local beekeepers, online stores, or even pick up a bee colony through a beekeeping association. The most common type of bee for beginners is the Italian bee, known for being gentle and productive.
It’s important to start with a healthy colony to ensure the success of your hive. When purchasing bees, ensure they come with a queen bee, workers, and drones. You can opt for packages or nucleus colonies (nucs), which contain established colonies in smaller hives.
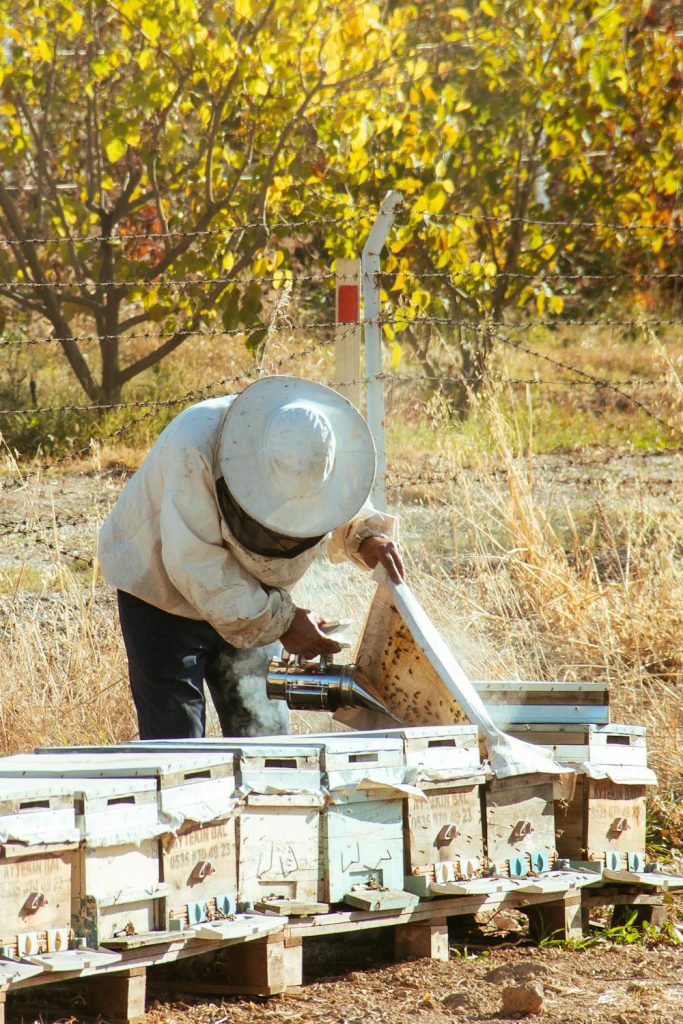
Protective Gear
Beekeeping involves working closely with bees, so it’s essential to wear protective gear to avoid stings. The most important protective equipment includes:
- Bee Suit: A full-body suit with a veil to protect your face and neck. A bee suit is designed to keep you safe while giving you enough mobility to work around the hive.
- Gloves: Beekeeping gloves are designed to protect your hands from bee stings while maintaining dexterity to handle tools and frames.
- Smoker: A smoker is an essential tool used to calm the bees while you’re working with them. The smoke causes the bees to gorge on honey, making them less likely to sting.
- Hive Tool: This tool is essential for prying apart the frames and manipulating hive components, especially when they’re stuck together.
Beekeeping Tools
In addition to the protective gear, you’ll need a few beekeeping tools for routine maintenance:
- Bee Brush: A gentle brush to move bees off frames when inspecting or harvesting honey.
- Uncapping Knife: A knife used to remove the wax cappings on honeycomb before extracting honey.
- Honey Extractor: This device is used to spin honey out of the honeycomb frames.

3. Preparing Your Backyard for a Beehive
Choosing the Right Location
Look for a spot in your backyard that receives at least 6-8 hours of sunlight each day. A sunny location helps the bees to be active and productive. Avoid placing the hive in an area that’s too windy or exposed to harsh weather conditions. Ideally, your hive should be near a source of fresh water, such as a pond or a birdbath, so bees can hydrate.
Legal Considerations
Before starting a beehive, make sure to check local regulations. Some cities and towns have restrictions on beekeeping, such as the number of hives you can keep or distance requirements from property lines. Research local zoning laws, and if you live in a suburban or urban area, check with your neighborhood association for any rules or guidelines related to beekeeping.
Space Requirements
A typical Langstroth hive needs a minimum of 3-4 feet of space on each side for proper ventilation and easy access for inspections. Make sure your backyard can accommodate the hive and provide enough space for you to maneuver comfortably.
4. Installing Your First Beehive
Unboxing and Setting Up the Hive
Start by assembling your hive. Most Langstroth hives come as flat-packed kits that you can easily put together. Follow the instructions carefully to ensure the hive is set up correctly. Place the hive on a solid, level surface to prevent it from tipping over. It’s important that the hive is elevated slightly off the ground to prevent moisture buildup.
Introducing Your Bees
Once your hive is set up, it’s time to introduce the bees. If you purchased a package of bees, carefully transfer them into the hive by opening the package and gently shaking them into the hive’s entrance. If you bought a nucleus colony (nuc), the bees will already be inside a smaller hive, so you’ll just need to transfer the nuc into the Langstroth hive.
The queen bee should be in a separate cage when you first introduce her to the hive. This cage will protect her while the worker bees gradually accept her. Once they do, you can release her into the hive.
Feeding Bees
For the first few weeks, your bees may need supplemental feeding to help them build their colony. A simple sugar syrup mixture can be used to feed the bees until they establish their foraging abilities. Place a feeder inside the hive and monitor their consumption, adjusting as needed.
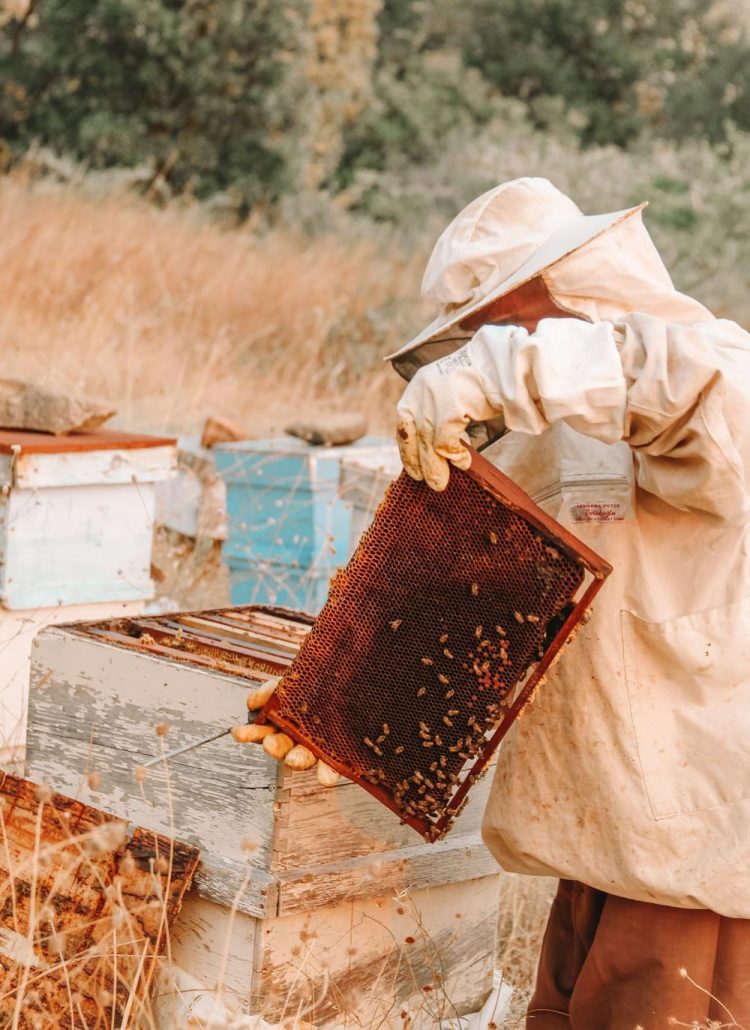
5. Basic Beekeeping Maintenance
Inspect your hive every 7-10 days during the warmer months to check on the health of the colony. Look for signs of healthy bees, such as good brood patterns and plenty of honey stores. You should also check for pests like varroa mites, which can weaken the colony. During inspections, avoid disturbing the bees too much to ensure minimal stress.
If you’re in a region with long winters, it’s crucial to ensure your bees have enough honey stored to survive the colder months. If their stores are low, you may need to provide supplemental food in the form of sugar syrup or candy boards. Be sure to monitor the hive’s weight during the winter, as a light hive could indicate a shortage of food.
Beekeeping isn’t without its challenges, and pests and diseases are a reality. Varroa mites, hive beetles, and wax moths are common threats to bee colonies. Regularly check for signs of these pests, and take action immediately if you spot an infestation. There are various natural and chemical treatments available to manage these pests.

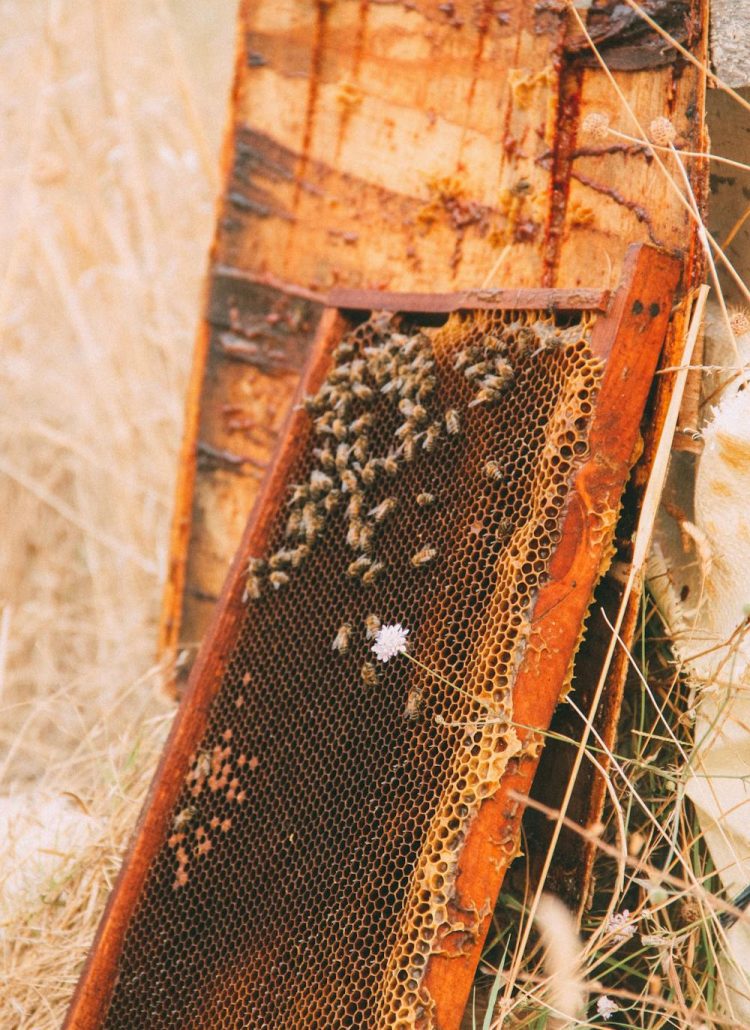
6. Harvesting Honey (When the Time Comes)
The right time to harvest honey is when the majority of the frames are full and the honey has been capped by the bees. This means the moisture content of the honey has reached the perfect level for storage. Avoid harvesting too early, as the honey may be too watery.
To harvest honey, you’ll need an uncapping knife to remove the wax cappings from the honeycomb. Once the cappings are removed, place the frames in a honey extractor to spin the honey out. The honey will then be filtered and stored in jars.
Once your honey is extracted, it’s important to store it properly. Keep your honey in clean, sealed jars away from direct sunlight and heat, which can affect its flavor and texture.
7. Tips for Success in Beekeeping
As with any new hobby, beekeeping takes patience and practice. Here are a few tips to ensure your success:
- Be Patient and Observant: Don’t expect to become an expert overnight. Take time to observe your bees and learn from them.
- Join Beekeeping Communities: There are many online and local beekeeping groups where you can connect with fellow beekeepers for advice and support.
- Keep Learning: The world of beekeeping is ever-evolving. Stay up to date by reading books (and our blog), attending workshops, or taking online courses.
8. Common Mistakes to Avoid
Beekeeping is rewarding, but there are a few mistakes that beginners often make. Here are some to watch out for:
- Over-Managing the Hive: Constantly opening the hive and disturbing the bees can stress them out. Only inspect when necessary.
- Ignoring Pests and Diseases: Be vigilant about pest control. Ignoring signs of infestations can lead to colony collapse.
- Choosing the Wrong Bee Species: Make sure you select a bee species that suits your climate and environment. Some bees are more suited for colder climates, while others thrive in warmer areas.
Conclusion: How to Start a Beehive in Your Backyard
Starting a beehive in your backyard is a rewarding and fulfilling experience. From providing a sanctuary for pollinators to harvesting your own honey, the benefits of beekeeping are numerous. With the right equipment, proper maintenance, and a little patience, you’ll be well on your way to becoming a successful beekeeper. Remember, beekeeping is a journey, and the more you learn, the more rewarding it will be.
So, what are you waiting for? Take the plunge into beekeeping, and enjoy the sweet rewards of your new hobby!


Leave a Reply