
Today, I want to share my passion for handmade beeswax candles and show you why they make the perfect DIY gift for virtually any occasion.
The Rich Heritage of Beeswax Candles
Beeswax candles have illuminated human spaces for thousands of years. Ancient Egyptians used them in religious ceremonies, while medieval monasteries relied on their steady flame to illuminate manuscripts. Unlike their modern paraffin counterparts (which are petroleum byproducts), beeswax candles represent one of humanity’s oldest sustainable lighting solutions.
What makes these candles special isn’t just their history, though—it’s the incredible material itself. Every ounce of beeswax represents the collective effort of thousands of bees. In fact, bees must consume about eight pounds of honey to produce a single pound of wax! When you gift someone a handmade beeswax candle, you’re sharing something truly precious that connects them to this ancient tradition and the remarkable work of honeybees.
I’ve given beeswax candles for birthdays, housewarmings, holidays, and even as thoughtful “just because” gifts. The reactions are always the same: genuine appreciation for something handcrafted, natural, and meaningful. In our world of mass-produced items and digital experiences, there’s something profoundly touching about a gift made with your own hands from materials straight from nature.
Why Beeswax Candles Outshine the Rest
If you’re wondering whether making beeswax candles is worth the effort compared to store-bought alternatives, let me share some compelling reasons why these golden treasures stand apart:
Natural Air Purifiers
Perhaps the most remarkable quality of beeswax candles is their ability to actually improve indoor air quality. When burned, beeswax releases negative ions that help neutralize positively charged particles like dust, pollen, mold, and even odor-causing molecules. These contaminants are then pulled out of the air, potentially reducing allergies and creating a cleaner environment.
I first noticed this effect years ago when burning candles in my workshop. The air seemed fresher, and I experienced fewer allergy symptoms during candle-making sessions. Many of my gift recipients have reported similar benefits, especially those with dust sensitivities or pet allergies.
A Longer, Cleaner Burn
Beeswax has the highest melting point of any wax, which translates to a significantly longer burning time. I’ve conducted side-by-side tests with paraffin candles of the same size, and the beeswax versions consistently last 2-3 times longer. This longevity makes them not just a gift, but an investment in countless cozy evenings.
Moreover, beeswax burns remarkably clean—producing virtually no soot compared to paraffin alternatives. This means no black residue on walls or ceilings, and no petroleum byproducts released into the home environment. For friends with children or pets, this clean-burning quality is particularly appreciated.
Nature’s Own Fragrance
The subtle, honey-sweet aroma of pure beeswax is intoxicating in its own right. Unlike artificial scents that can trigger headaches or irritation, this natural fragrance creates an inviting atmosphere without overwhelming the senses. Each batch of wax carries subtle variations in scent depending on the flowers the bees visited, making every candle uniquely tied to a specific time and place.
I often tell gift recipients about the specific apiaries where I sourced the wax, connecting them to the local ecosystem and the flowering plants that contributed to their candle’s distinctive character.
Supporting Sustainable Practices
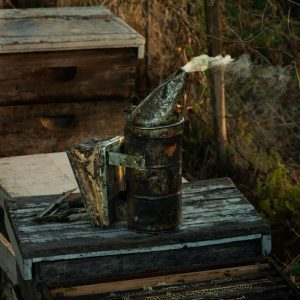
By creating and gifting beeswax candles, you’re supporting bee populations and sustainable beekeeping practices. Small-scale and hobbyist beekeepers like myself rely on wax sales alongside honey to maintain our hives. Every purchase or gift of beeswax products helps fund pollinator habitat maintenance and responsible bee stewardship.
I’ve watched friends who received my candles as gifts develop a newfound appreciation for bees and their role in our ecosystem. Several have even taken up beekeeping themselves, creating a wonderful ripple effect from a simple handmade gift!

Essential Materials and Tools for Beeswax Candles
Sourcing Quality Beeswax
The foundation of any great candle is high-quality wax. I strongly recommend purchasing beeswax directly from local beekeepers whenever possible. Not only does this ensure freshness and purity, but it also builds community connections and supports local agriculture. Most beekeepers at farmers’ markets sell wax alongside their honey, often at reasonable prices.
If local sources aren’t available, several reputable online suppliers specialize in pure, filtered beeswax for crafting. Look for wax that has a pleasant honey scent and a light to golden yellow color (unless it’s been bleached white, which is also acceptable for certain projects).
Beeswax comes in several forms:
- Blocks: Economical for larger projects but requires cutting and melting
- Pellets: More expensive but melts quickly and evenly without preprocessing
- Sheets: Pre-rolled for making dipped or rolled candles
For beginners, I suggest starting with pellets, as they simplify the melting process and reduce the risk of scorching your wax.
Selecting the Right Wicks
The wick is the unsung hero of any candle, determining how it burns and how much light it produces. For beeswax specifically, you’ll need slightly larger wicks than you would for softer waxes, as beeswax has a higher melting point.
Cotton wicks are traditional and work beautifully with beeswax. I prefer “square braided” cotton wicks for most projects, as they curl slightly while burning, which helps with self-trimming. For container candles, “tabbed” wicks (with metal discs at the bottom) make positioning much easier.
Sizing is crucial—too small, and your candle will tunnel; too large, and it will smoke or burn too quickly. Here’s a general guide:
- 1-2 inch diameter candles: #2/0 or #3/0 wick
- 2-3 inch diameter candles: #4/0 or #6/0 wick
- 3+ inch diameter candles: #8/0 or larger
I always recommend buying an assortment when starting out, as you’ll likely want to experiment with different sizes.
Essential Equipment
While candle making doesn’t require a huge investment, a few specific tools will make the process much more enjoyable:
- Double boiler setup: Never melt wax directly over heat! I use either a purpose-made double boiler or a heat-resistant glass bowl over a pot of simmering water.
- Thermometer: A candy or candle thermometer that can read up to 200°F (93°C) is ideal for monitoring wax temperature.
- Heat source: A kitchen stove works perfectly, though I’ve used hot plates for workshops.
- Containers or molds: Mason jars, teacups, vintage glassware, or purpose-made molds all work beautifully.
- Pouring pot: A container with a spout makes filling molds much cleaner and more precise.
- Stirring utensils: Wooden skewers or chopsticks work well and can be composted after use.
- Wick holders: Pencils, chopsticks, or specialized wick holders to keep wicks centered while wax solidifies.
Most of these items can be found around your home or purchased inexpensively at craft stores. I recommend designating specific tools for candle making, as beeswax can be challenging to clean completely from cooking utensils.
How to Make Beeswax Candles
Now comes the fun part! Let’s walk through the process of creating basic beeswax candles that will delight anyone lucky enough to receive them.
Melting the Liquid Gold
Beeswax requires careful melting to preserve its beneficial properties and prevent scorching. I always follow these steps:
- Set up your double boiler with water in the bottom pot.
- Heat the water to a gentle simmer (not a rolling boil).
- Add your beeswax to the top portion, starting with a small amount and adding more as it melts.
- Monitor the temperature carefully, keeping it between 145-175°F (63-80°C).
- Stir occasionally with a wooden implement.
Never leave melting wax unattended—it can reach its flash point and ignite if overheated! The melting process typically takes 20-30 minutes depending on quantity and form (pellets melt faster than blocks).
I find there’s something meditative about watching solid wax transform into shimmering liquid gold. This is a good time to center yourself and think about the recipient of your handmade gift.
Preparing Containers and Wicks
While your wax is melting, prepare your containers and wicks:
- Clean containers thoroughly and ensure they’re completely dry.
- If using wick tabs, secure them to the bottom center of each container with a drop of melted wax.
- Cut wicks approximately 2-3 inches longer than your container’s height.
- Position wicks in the center using wick holders across the top of the container.
For molded candles, lightly coat the inside of molds with a natural oil spray to facilitate easier removal later.
A pro tip I’ve learned over years of teaching candle making: pre-warm your containers before pouring. Room-temperature glass can sometimes cause the wax to pull away from the sides as it cools. I place my containers on a baking sheet in a low oven (about 170°F/75°C) for 5-10 minutes before pouring.
The Perfect Pour
Once your wax has completely melted and reached approximately 160°F (71°C), it’s time to pour:
- Remove your wax from heat and let it cool slightly to about 150-155°F (65-68°C).
- Pour slowly into your prepared containers, leaving about ½ inch of space at the top.
- If making molded candles, fill to the very top as wax will contract as it cools.
- Check that your wicks remain centered during the pouring process.
I always pour over a protected surface, as spills are inevitable even for experienced candle makers! A sheet of parchment paper works well for easy cleanup.
The Waiting Game
Patience truly is a virtue in candle making. Allow your candles to cool and cure completely:
- Let candles cool at room temperature for at least 24 hours.
- Avoid moving or disturbing them during this time.
- Once completely solid, trim wicks to approximately ¼ inch above the wax surface.
- For optimal results, allow candles to cure for 2-3 days before burning.
This waiting period allows the wax to fully stabilize and results in a better burning candle. I often use this time to plan the presentation and packaging of my gifts.

Creative Variations for Every Occasion
Now that you’ve mastered the basics, let’s explore how to customize your candles for specific occasions and recipients. This is where your handmade gifts truly become one-of-a-kind treasures.
Birthdays: Celebration Candles
For birthday gifts, I love creating candles with embedded dried flowers or herbs that have symbolic meaning. Lavender for tranquility, rose petals for love, or marigold for joy can be pressed against the sides of clear containers before pouring. The result is a stunning visual effect that makes each candle truly special.
Another birthday favorite is creating layered candles that reveal themselves gradually as they burn. I’ll pour a thin layer of wax with one botanical element, let it partially set, then add another layer with different elements. The birthday recipient gets to discover new surprises as the candle burns down.
Seasonal Holiday Gifts
Holidays present wonderful opportunities for themed beeswax creations:
For winter celebrations, I incorporate pine needles, cinnamon sticks, star anise, or small pinecones into container candles. The natural elements complement the honey scent of beeswax perfectly and create a festive atmosphere.
Spring occasions call for fresh, bright elements. I’ve had great success adding a few drops of citrus essential oils (lemon, orange, or grapefruit) to beeswax for a subtle scent boost that doesn’t overwhelm the natural honey aroma.
For autumn gatherings, I sometimes mix a small amount of cinnamon, clove, or vanilla essential oil into my beeswax. Just 5-10 drops per pound of wax is sufficient to enhance the natural scent without creating an artificial fragrance profile.
Wedding and Anniversary Treasures
For milestone celebrations, presentation is everything. I create elegant taper candles using traditional dipping methods, then present them in vintage candleholders found at thrift shops. The combination of handcrafted candles and unique holders makes for a memorable gift that honors the significance of the occasion.
Another wedding favorite is creating unity candles from pure beeswax. These special ceremonial candles carry deeper meaning when made by hand with natural materials, and many couples treasure them as keepsakes long after their wedding day.
Therapeutic Wellness Candles
For friends going through challenging times, I create candles designed specifically for comfort and healing. By adding a few drops of lavender, chamomile, or sandalwood essential oil to beeswax, I create gentle aromatherapy candles that promote relaxation and well-being.
I always include a note explaining the intentional nature of these wellness candles, suggesting they be lit during moments of stress or difficulty as a reminder of support and care.
Packaging That Completes the Gift
The presentation of your handmade candles adds significantly to their impact as gifts. I believe packaging should honor both the craft itself and our environmental responsibilities.
Eco-Friendly Wrapping Options
Rather than plastic or synthetic materials, I wrap my candles in:
- Kraft paper secured with twine or cotton string
- Reused fabric scraps using Furoshiki (Japanese fabric wrapping) techniques
- Recycled paper embedded with wildflower seeds that can be planted after unwrapping
These approaches extend the sustainability story of beeswax candles and create a complete gift experience that aligns with natural values.
Personalized Touches
Personal details transform a nice gift into something truly memorable:
- Create simple handwritten tags noting the source of the wax and any special ingredients.
- Include burning instructions to help recipients get maximum enjoyment from their candles.
- Add a small honey dipper, sample of honey, or seed packet for pollinator-friendly flowers as companion gifts.
I’ve found that explaining the beeswax’s journey—from hive to gift—helps recipients appreciate the special nature of what they’re receiving. A simple card stating “This candle begins with flowers, continues with bees, and finds its purpose with you” connects them to the full circular story.
Gift Basket Combinations
For special occasions, consider creating themed gift sets:
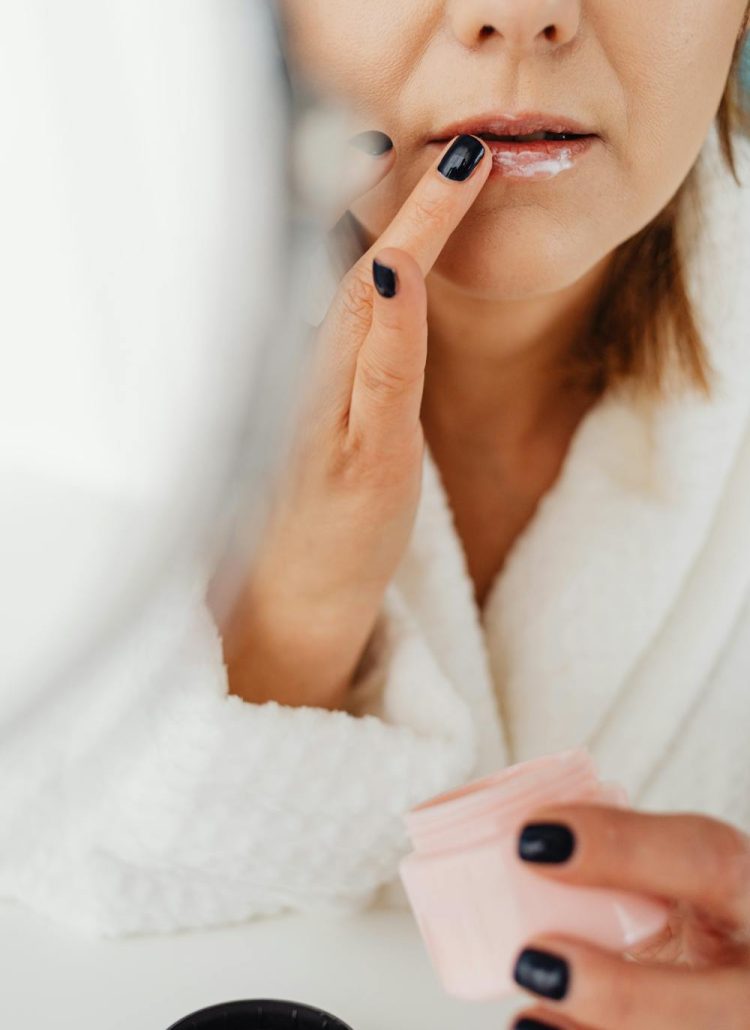
- Self-Care Collection: Beeswax candles paired with honey-based skincare products and a handcrafted beeswax lip balm
- Home Warming Bundle: Several candles in varying sizes with a quality matchbox and candle snuffer
- Gardener’s Delight: Pollinator-friendly seed packets, a beeswax candle, and local honey
These thoughtfully curated collections extend the impact of your handmade gifts and create a more significant impression than a single item.
See More: How to Make Beeswax Lip Balm at Home: A Step-by-Step Guide
Common Candle Challenges
Even experienced candle makers encounter occasional issues. Here’s how I address the most common problems:
Surface Irregularities
Uneven surfaces or sinkholes often form as beeswax cools and contracts. To remedy this:
- Reserve a small amount of melted wax during your initial pour.
- Once your candles have completely cooled and any sinkholes have formed, reheat your reserved wax.
- Pour a thin layer over the top to create a smooth, even surface.
This “second pour” technique creates a professional finish that makes your candles gift-worthy.
Tunneling Troubles
If your test candle burns down the middle leaving wax along the sides (tunneling), your wick is likely too small for the diameter. For already-made candles:
- Carefully remove some wax from around the existing tunnel.
- Create a wider burning area for your next lighting.
- Always ensure the first burn of any candle allows the melted wax pool to reach the outer edges.
When making future candles, select a larger wick size more appropriate for your container’s diameter.
Wick Woes
Occasionally, wicks may extinguish themselves or burn unevenly. This typically results from:
- Trimming wicks too short (leave ¼ inch above the wax surface)
- Drafty locations that cause uneven burning
- Debris falling into the melted wax pool
I always include a note with gift candles advising recipients to trim wicks before each lighting and to burn candles away from drafts for optimal performance.
Salvaging Mistakes
Even “failed” candles needn’t go to waste! I keep a collection jar for any projects that don’t turn out perfectly. This wax can be:
- Remelted to create new candles
- Formed into fire starters for woodstoves or campfires
- Made into wax melts for flameless fragrance
Sharing this “waste not” approach with gift recipients helps them understand the sustainable nature of natural wax products.
Final Thoughts: Handmade Beeswax Candles: The Perfect DIY Gift for Any Occasion
If you’ve read this far, you likely feel the pull toward creating these golden treasures yourself. Here’s my encouragement to take the first step:
Start small. A simple batch of container candles in repurposed jars requires minimal investment but delivers the full experience of working with this remarkable material. Feel the wax, smell its honey aroma, watch it transform from solid to liquid and back again.
Notice how the process itself slows your pace and focuses your attention. In my experience, candle making becomes not just a means to create gifts, but a gift to yourself—a few hours of engaged, sensory-rich activity that produces something beautiful and functional.
The bees have done the first part of this work, transforming nectar into honey, consuming honey to produce wax, and building their remarkable honeycomb architecture. When we melt and reshape their wax into candles, we become the final collaborators in this ancient partnership between humans and honeybees.
I’d love to hear about your own beeswax adventures! Share your creations, questions, and discoveries in the comments below.
Until then, may your days be sweet, your gifts meaningful, and your candles burn bright with the natural glow that only beeswax can provide.


Leave a Reply