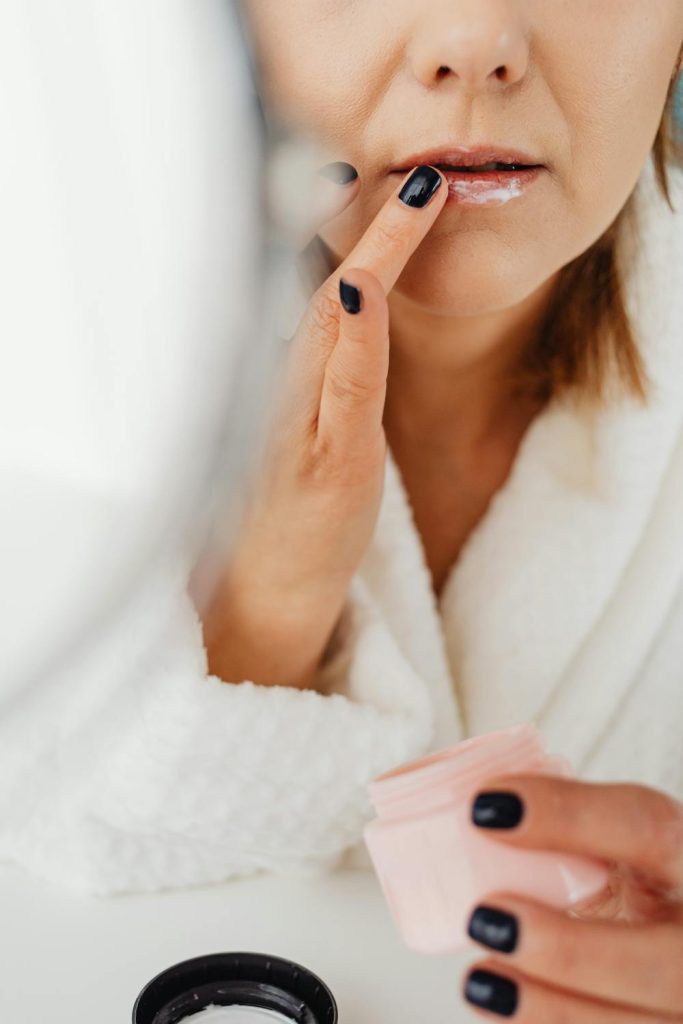
I’ve developed a deep appreciation for every product that comes from my hives. While honey gets most of the attention, beeswax has become one of my favorite beehive treasures to work with. Today, I’m excited to share my comprehensive guide on creating your own natural beeswax lip balm at home.
There’s something incredibly satisfying about applying lip balm made with wax from your own hives—or even from locally sourced beeswax. Not only does homemade lip balm avoid the chemicals and preservatives found in commercial products, but it also creates a meaningful connection to the incredible work of honeybees.
Why Make Your Own Beeswax Lip Balm?
Store-bought lip balms often contain petroleum products, artificial fragrances, and preservatives that can actually dry your lips over time, creating a cycle of dependency. When you make your own beeswax lip balm, you control exactly what goes onto your lips.
I started making lip balm after noticing how dry and cracked my lips would get during long days tending to my hives. Commercial products just weren’t cutting it, and I wanted something that honored the bees’ hard work while actually healing my lips.
The benefits of homemade beeswax lip balm include:
- Truly moisturizing ingredients that heal rather than temporarily mask dryness
- Customizable formulations to address your specific needs
- Cost-effectiveness when made in batches
- Sustainable packaging options that reduce plastic waste
- Gift-giving potential for friends and family
One batch of homemade lip balm typically costs me about $10-15 in materials and yields 15-20 tubes—that’s less than $1 per tube compared to $3-5 for natural lip balms in stores.
Essential Materials for Your Homemade Lip Balm
Before we dive into the process, let’s gather everything you’ll need:
Ingredients:
- 1 oz (28g) beeswax (preferably from a local source)
- 2 oz (56g) carrier oils (I recommend a mix of sweet almond, coconut, and olive oils)
- 5-10 drops essential oils (optional—peppermint, lavender, and citrus work beautifully)
- 1/4 tsp vitamin E oil (as a natural preservative)
- Optional: 1/8 tsp honey for extra moisturizing properties
Equipment:
- Double boiler (or a heat-safe glass measuring cup in a pot of water)
- Kitchen scale for accurate measurements
- Small whisk or stirring rod
- Droppers for essential oils
- Lip balm tubes or small containers (yields approximately 15-20 standard tubes)
- Labels for your finished product
- Pipette or small funnel for filling tubes
I’ve found that investing in a dedicated set of equipment for making beeswax products prevents any cross-contamination with food preparation tools.
How to Source High-Quality Beeswax
The foundation of an exceptional lip balm is high-quality beeswax. As a beekeeper, I harvest my own, but there are several options for those without hives.
Identifying Pure Beeswax
Pure beeswax should have:
- A subtle, honey-like aroma
- A light yellow to amber color (unless it’s been bleached)
- A firm texture that’s slightly tacky when warm
- A clean break when snapped, not a greasy feel
Beware of products labeled as “beeswax blends,” which often contain paraffin or other petroleum-derived waxes.
Local vs. Commercial Sources
I strongly recommend sourcing beeswax from:
- Local beekeepers at farmers’ markets or through beekeeping associations
- Small-scale apiaries that sell online
- Reputable natural product suppliers that provide information about their sourcing
When I purchase from other beekeepers, I always ask about their mite treatment practices, as some treatments can leave residues in wax.
How to Prepare Raw Beeswax
If you’re working with raw, unfiltered beeswax directly from a hive (like I often do), you’ll need to clean it:
- Break the wax into small chunks
- Melt it slowly in a double boiler with water
- Allow impurities to settle at the bottom
- Pour the clean wax through a fine mesh strainer lined with cheesecloth
- Let it harden, then scrape off any remaining debris from the bottom
This process might need to be repeated 2-3 times for perfectly clean wax. The resulting golden discs of beeswax will be free from honey residue, propolis, and bee parts.
Basic Beeswax Lip Balm Recipe
After years of experimentation, I’ve developed this foolproof recipe that strikes the perfect balance between protective and moisturizing:
Ingredients (Makes 15-20 tubes):
- 1 oz (28g) beeswax
- 1 oz (28g) coconut oil
- 0.5 oz (14g) sweet almond oil
- 0.5 oz (14g) olive oil
- 1/4 tsp vitamin E oil
- 5-10 drops essential oil (optional)
Step-by-Step Process:
- Prepare your workspace: Clean all surfaces and gather your equipment. Set up empty lip balm tubes or containers on a stable surface.
- Measure carefully: Use a kitchen scale to weigh beeswax and oils accurately. The ratio of wax to oils determines the final hardness of your lip balm.
- Create a double boiler: Fill a pot with a couple inches of water and place a heat-safe glass measuring cup or bowl in the center. The water should not touch the bottom of the inner container.
- Melt the beeswax first: Add the beeswax to your double boiler and melt completely over medium-low heat. Beeswax has the highest melting point (around 145°F/63°C), so it needs a head start.
- Add carrier oils: Once the beeswax is fully melted, add the coconut oil and stir until combined. Then add the liquid oils (sweet almond and olive). Maintain low heat to keep everything melted.
- Add vitamin E and essential oils: Remove from heat and immediately add vitamin E oil and any essential oils. These ingredients are heat-sensitive and will degrade if added too early.
- Test consistency: Dip the tip of a spoon into the mixture and place it in the freezer for a minute. This gives you a preview of the final texture. If it’s too hard, add a bit more liquid oil; if too soft, add a tiny bit more beeswax.
- Pour quickly: Using a pipette or small funnel, fill each container. Work rapidly as the mixture will begin to solidify as it cools.
- Allow to set: Let your lip balm sit undisturbed for at least an hour. The tops may sink slightly as they cool—this is normal.
- Cap and label: Once completely cool, cap your containers and add labels with the date and ingredients.
I’ve noticed that letting the lip balm cure for 24 hours before use seems to improve the texture and performance.

4 Common Issues
Even after making hundreds of batches, I occasionally encounter issues. Here’s how I address them:
Grainy Texture
This usually happens when coconut oil cools too slowly. To fix it:
- Melt the batch again
- Stir continuously while cooling
- Consider adding the coconut oil last
Too Hard or Too Soft
The beauty of homemade lip balm is that it’s fixable:
- Too hard? Remelt and add more liquid oil
- Too soft? Remelt and add more beeswax
- Document your adjustments for future batches
Sweating or Separation
If your lip balm develops beads of oil on the surface:
- The cooling process was likely too slow
- Some essential oils can cause separation
- Try reducing the amount of honey if you added any
Tunneling (Center Collapses)
If the center sinks dramatically:
- Pour at a slightly lower temperature next time
- Consider filling in two layers
- Tap containers gently while cooling to release air bubbles
How to Customize Your Lip Balm
The basic recipe provides an excellent foundation, but customization is where the magic happens. I’ve created dozens of variations over the years, each with specific benefits.
Carrier Oil Variations
Different carrier oils offer unique properties:
- Sweet almond oil: My go-to base oil for its light texture and vitamin E content
- Jojoba oil: The closest to human sebum, making it ideal for sensitive lips
- Coconut oil: Provides antimicrobial properties but can be comedogenic for some
- Avocado oil: Extra conditioning for severely chapped lips
- Olive oil: Readily available and rich in antioxidants
- Shea butter or cocoa butter: Can replace some of the oil portion for extra richness
I recommend starting with a blend of 2-3 oils rather than just one type.
Essential Oil Combinations
Essential oils add therapeutic benefits and pleasant scents. Always use high-quality, food-grade oils and limit to about 5-10 drops per batch:
- Peppermint: Creates a pleasant tingle and increases circulation (my personal favorite)
- Lavender: Calming and healing for damaged lips
- Citrus oils: Uplifting scents, but use cautiously as they can increase sun sensitivity
- Vanilla: A comforting scent that pairs well with almost anything
- Tea tree: In small amounts, provides antimicrobial benefits for cold sore-prone lips
My favorite combination is 3 drops peppermint with 2 drops sweet orange—it creates a chocolate-orange effect that’s surprisingly delicious.
Natural Coloring Options
For tinted lip balm, consider these natural colorants:
- Alkanet root powder: Creates beautiful red to purple hues
- Beetroot powder: Gives a natural pink tint
- Cinnamon: Adds a subtle warm hue and plumping effect
- Cocoa powder: Creates a brown tint for a more neutral look
I infuse my oils with these ingredients beforehand, then strain them before mixing with beeswax.
Healing Additions
For extra therapeutic benefits, consider adding:
- Honey: Adds humectant properties (draws moisture to lips)
- Propolis extract: Provides antimicrobial benefits
- Calendula-infused oil: Soothes irritated skin
- Lanolin: Excellent for extreme weather protection (though not vegan)
Specialty Formulations for Specific Needs
Over the years, I’ve developed targeted formulations for different conditions:
Extra Healing Balm for Winter
- Increase beeswax to 1.25 oz
- Add 1/4 tsp lanolin
- Use calendula-infused olive oil
- Add 3 drops chamomile essential oil
Summer SPF Balm
- Add 1 tsp non-nano zinc oxide (provides about SPF 15)
- Increase liquid oils slightly to maintain texture
- Consider adding carrot seed oil for natural sun protection
- Use vanilla or coconut essential oil for a tropical scent
Overnight Intensive Treatment
- Add 1/4 tsp honey
- Increase shea or cocoa butter to 0.5 oz
- Use extra vitamin E oil
- Apply generously before bed
Kid-Friendly Balm
- Omit essential oils or use only a tiny amount of food-grade vanilla
- Add a touch of honey for sweetness
- Consider using fun containers
- Involve children in the making process (with supervision).
Tips for Beeswax Lip Balm Success
After making hundreds of batches over the years, I’ve gathered some wisdom that isn’t found in standard recipes:
Seasonal Adjustments
I adjust my formulations with the seasons:
- Winter: Increase beeswax slightly for longer-lasting protection
- Summer: Add more liquid oils for a softer texture that won’t melt in the heat
- Spring/Fall: The basic recipe works perfectly
Working with Different Types of Beeswax
Wax characteristics can vary:
- Cappings wax (from honey extraction) is the finest quality and lightest in color
- Brood comb wax is darker and may have a stronger scent
- Commercial white beeswax may be bleached and have less aroma
- Beeswax pastilles melt more quickly than block wax
I prefer using cappings wax from my own hives for the purest product, but any clean beeswax will work.
Safety Precautions
Working with melted wax requires care:
- Never leave melting wax unattended
- Use dedicated equipment that won’t be used for food
- Keep a fire extinguisher nearby
- Protect surfaces from wax drips (wax is notoriously difficult to remove)
- Be careful with essential oils around children and pets
Conclusion: The Joy of Working with Beeswax
Creating your own beeswax lip balm connects you to a tradition that’s thousands of years old. There’s something deeply satisfying about transforming raw materials from nature into something healing and useful.
As a beekeeper, I find making lip balm a wonderful way to use every gift the bees provide. The same wax that once housed honey and brood now protects our lips from harsh weather—a beautiful example of sustainable living.
I encourage you to start with the basic recipe, then experiment with your own variations. Document what works, learn from what doesn’t, and enjoy the process. Your lips—and anyone lucky enough to receive your homemade balm as a gift—will thank you.
Remember that each batch may be slightly different, especially when working with natural ingredients. Embrace the variations as part of the charm of handcrafted products.
Have you tried making beeswax lip balm before? I’d love to hear about your experiences in the comments below!


Leave a Reply